
| GOAL: Customize your main site menu so visitors (and your instructor) can easily navigate your blog. In this guide, you’ll organize your menu, select the pages you want to include, and ensure its visible on your published site. |
| Task: Organize your menu by dragging your assignment categories under the appropriate course category. |
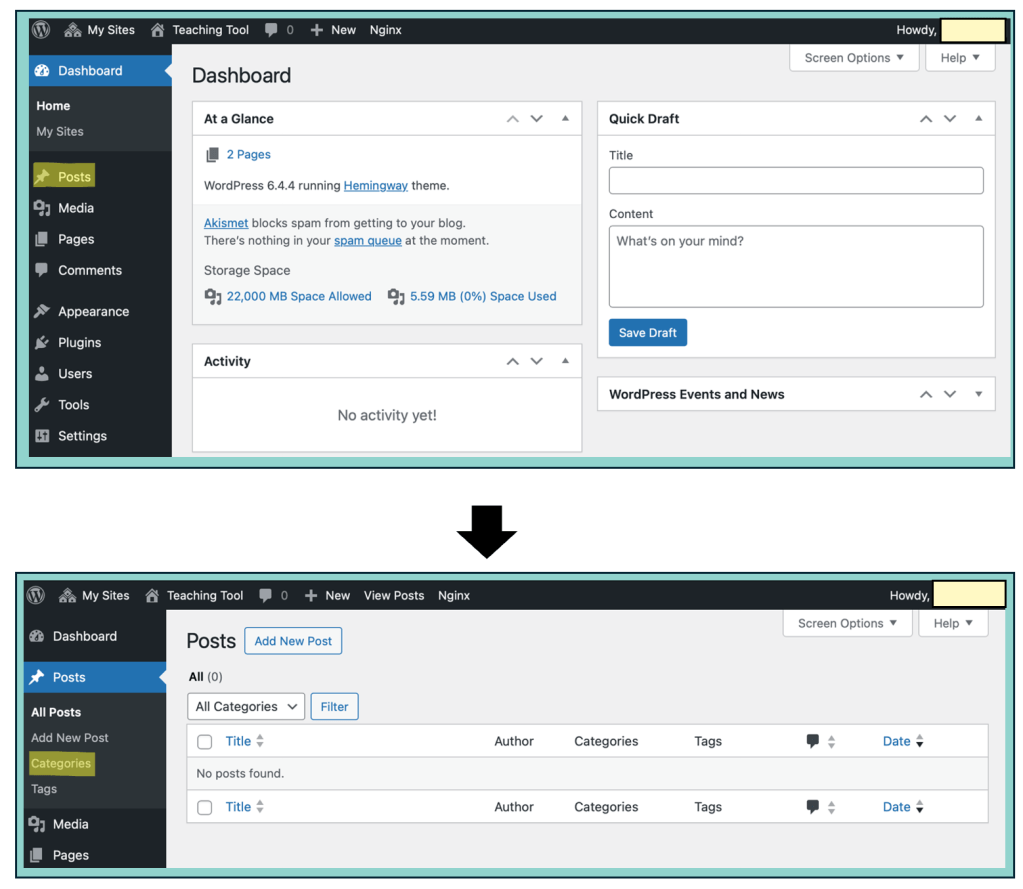
- Navigate to your Dashboard by clicking on your Site Title Button in the top-left corner of the menu bar, then selecting Dashboard from the dropdown.

- In your Dashboard, click on Posts from the left-hand menu. When the dropdown appears, select Categories to begin organizing your content.
| Important: Menus and categories are key organizational tools that help make your site easy to navigate. – Use the menu to structure your site’s layout and guide visitors to important areas. – Use categories to organize your blog posts, like folders that group similar pieces of content together. The majority of your work will be published as blog posts, and categories allow you to sort these posts by topic or theme. Pages are different. They’re used for stand-alone content that doesn’t change often—such as an About Me page. Pages are not organized using categories. Both categories and pages can be added to your menu to create a structured and accessible site for your readers. If this feels a little confusing right now, that’s okay. More guidance is coming in the next steps. |
- Add new categories to organize your blog posts by entering a Name (e.g., “Reflections”) and a Slug (a short, lowercase version with no spaces, e.g., reflections) for each section. Then click Add New Category to save.
| Important: The categories you create will depend on your course, instructor, assignments, and how you intend to use your site. You are encouraged to explore and experiment with different categories to suit your needs. For example: – If you are in EDCI 136 and required to complete weekly reflections and a deep dive inquiry, you might create the categories: EDCI 136, Weekly Reflections, and Deeper Dive Inquiry. – If you’re in EDCI 338 with assignments like blog posts, peer responses, and a micromodule overview, you might create: EDCI 338, Blog Posts, Peer Responses, and Micromodule Overview. The exact categories may vary for any course or section you are in, but the process for creating them remains the same. |
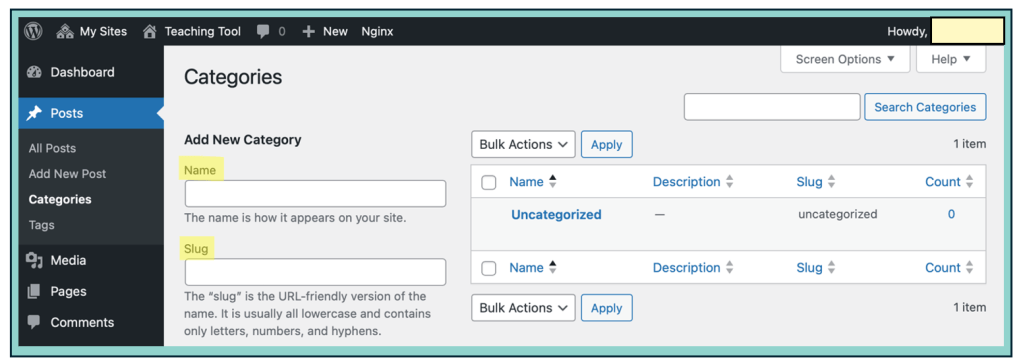
| Key Terms: – Name is the label your visitors will see on the Menu Bar that is one your published site. It can include Capitals and Spaces. E.g., Weekly Reflections, Peer Responses, Deeper Dive Inquiry, etc. – Slug is the URL-friendly version of the name. It should be all lowercase letters, numbers, and hyphens. You can leave the slug blank unless you want to customize it. E.g., weekly-reflections, peer-responses, deep-dive-inquiry, etc. |
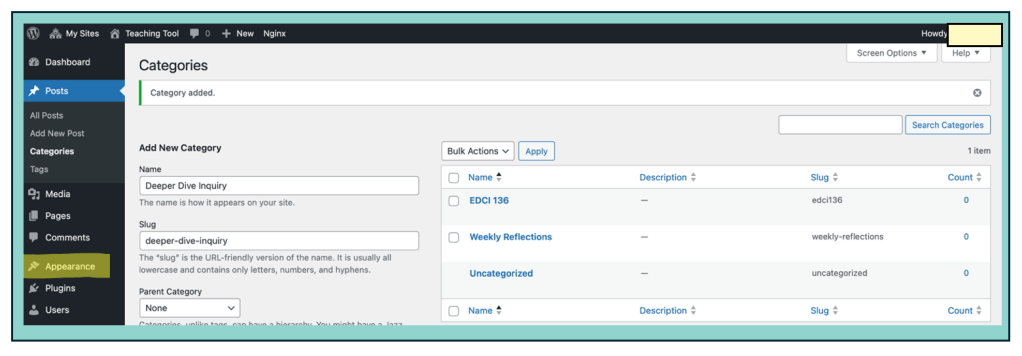
| Important: For the remainder of this guide, I am going to pretend that I am a student in EDCI 136 with the course assignments of Deeper Dive Inquiry and Weekly Reflections. Therefore, I will make three categories: – EDCI 136 (name) // edci136 (slug) – Weekly Reflections (name) // weekly-reflections (slug) – Deeper Dive Inquiry (name) // deeper-dive-inquiry (slug) |

- Once you’ve added all the categories you need for your course(s), click on Appearance in the left-hand menu to continue customizing how your site is organized.
| Task: Depending on the course you are in, add the categories you need. Start by adding a category for the course name, then create categories for the main types of assignments you’ll complete throughout the term. |
- Next, click on Menus under the Appearance section.
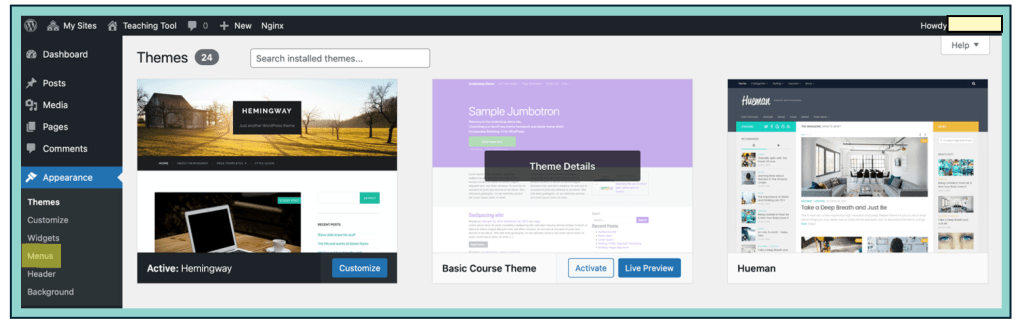
- This is where you can add items to your menu, such as pages, categories, or custom links, to help visitors navigate your site.
| Important: The Add Menu Items section is where you choose what to include in your site’s menu. Since you just created categories, you’ll now click on Categories and select the ones you want to add. If you’d like to include a page—such as the About Me page you created in the previous guide—you can do that here too by selecting Pages. You can also use Custom Links to add external websites, such as your course website, making it easy for visitors (and your instructor) to access key resources directly from your blog. |
- Add your About Me page to your menu by selecting it from the Pages section and clicking Add to Menu.
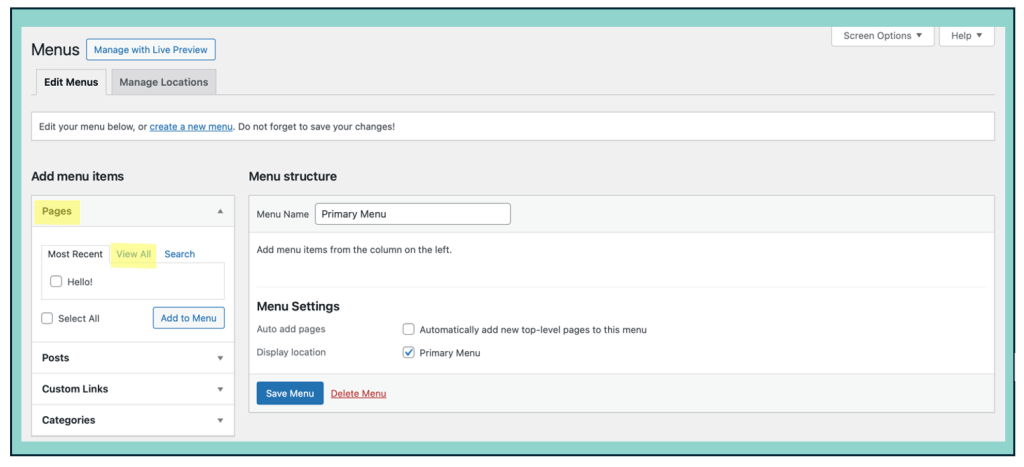

| Task: Add your About Me page to your menu before continuing. This page is an important part of your blog—it helps visitors understand who you are and what your site is about. |
- Add your course-related categories to your menu by selecting them from the Categories section and clicking Add to Menu.

- Select all the categories you want to add to your menu by clicking their checkboxes. Once selected, click Add to Menu, then make sure to click Save Menu to apply your changes.
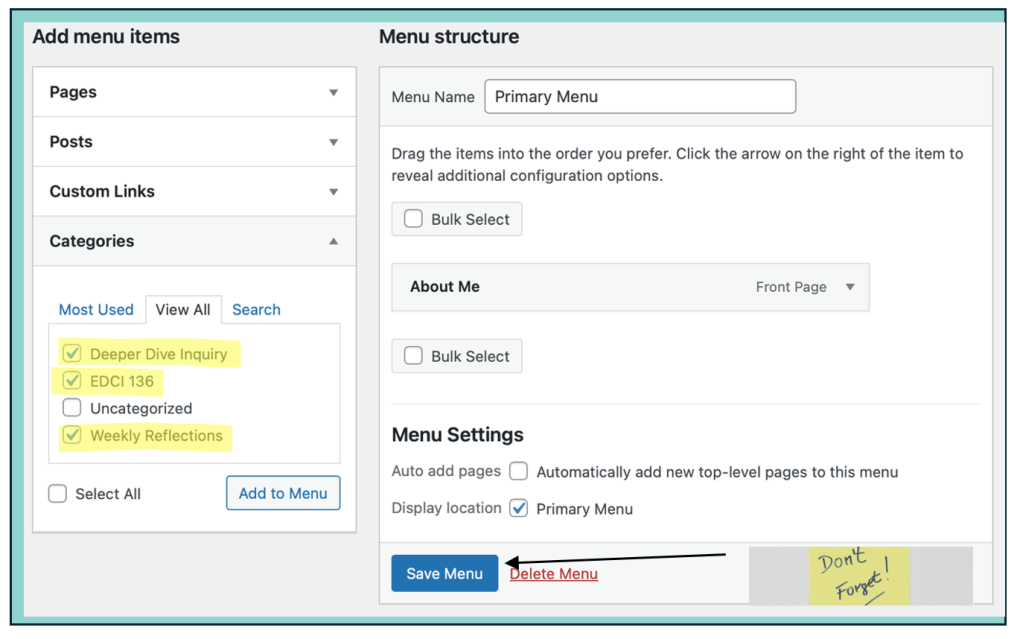
| Task: Add the categories you created to your menu. This helps organize your blog posts by topic and makes it easier for your instructor and visitors to find the content you’re creating throughout the course. |
- Your menu structure should now reflect the key sections of your site and might look something like the example shown below.

| Important: This menu is a bit unorganized. If you’re managing multiple courses or dividing your site into personal, professional, and academic sections, leaving the menu like this would make it hard to navigate and less accessible for your visitors. |
| Tip: You can rearrange your categories and pages to create a clear structure for your menu. Items that are aligned to the far left will appear as main menu sections, while any item placed under and slightly to the right of another will become a sub-category—appearing in a dropdown menu on your published site. |
- Drag and organize your categories so that they appear under your course name in the menu structure.
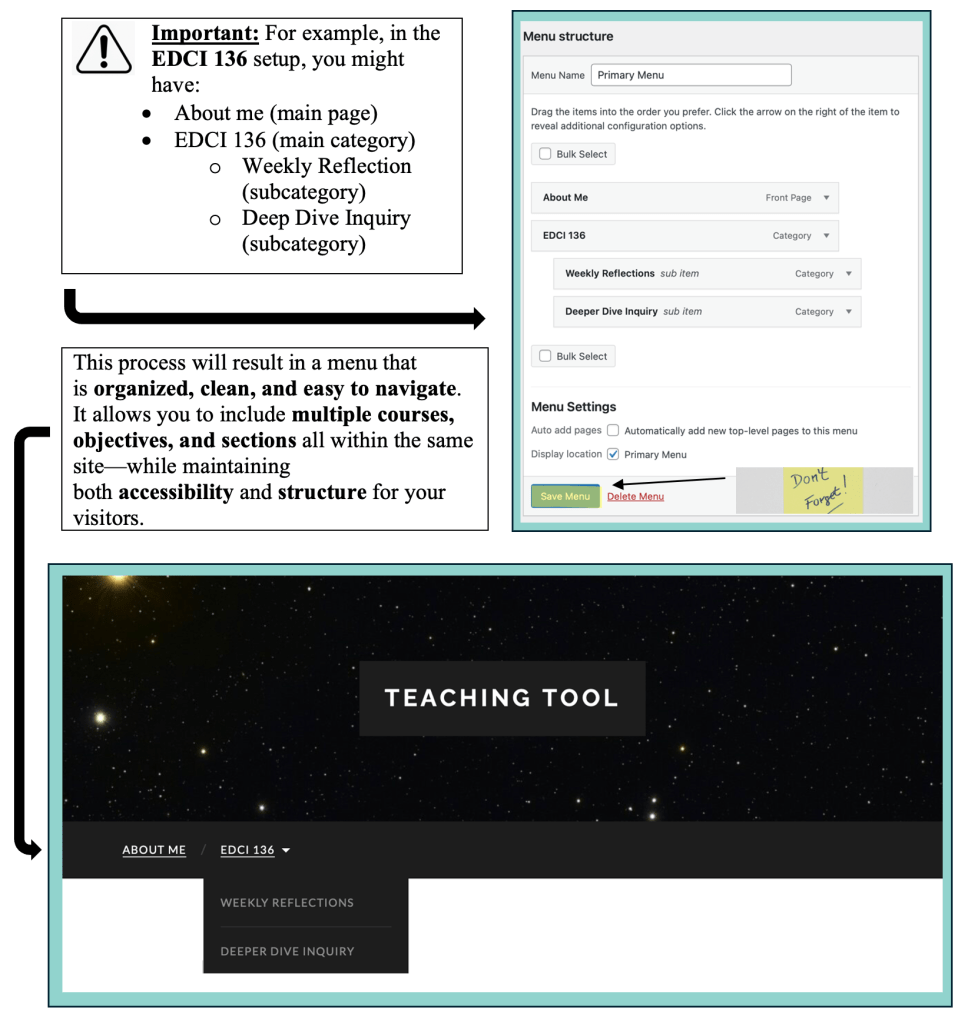
Once you have completed the steps above, please move on to the next guide: Finalizing Your Site’s Setup: Clean Up and About Me Page
