GOAL: Explore the basic features of your UVic OAC WordPress site so you can confidently navigate the dashboard, personalize your blog, and begin building your Personal Learning Network (PLN).
Once you’re signed in, you’ll see a black menu bar at the top of your screen. This is your WordPress admin toolbar, and it will be referred to as the menu bar throughout this guide, course materials, and videos.
Important: If you don’t see the black menu bar at the top of your screen, it means you are not signed in. Return to Step 1 of this guide to log in through your site’s admin URL.
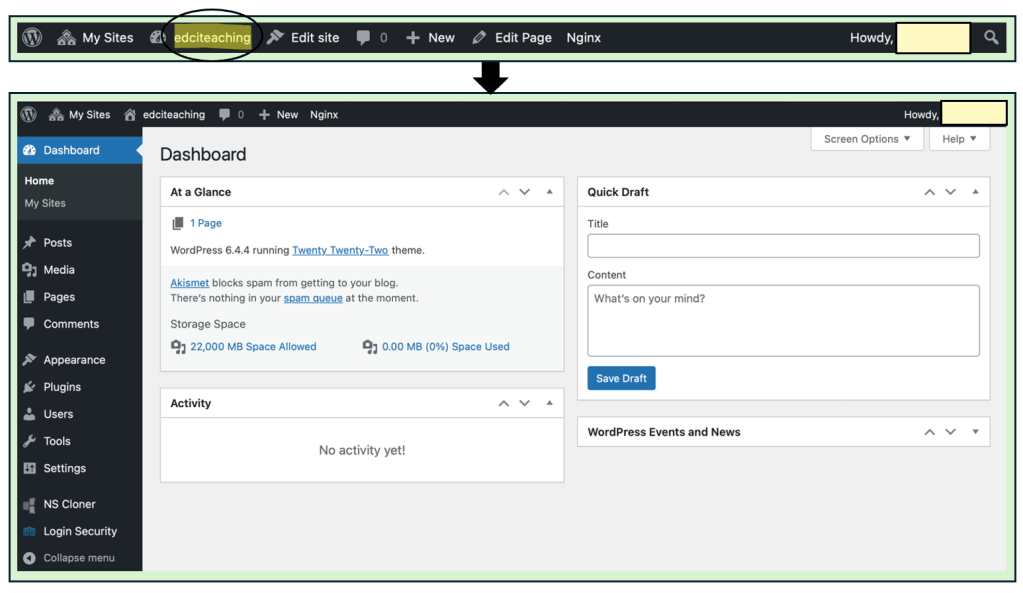
Important: The button labelled ‘edciteaching’ in this guide will display your site’s title, based on what you selected during setup. This is called the Site Title Button, and it allows you to switch between your published site view and your dashboard.
Important: The yellow box shown in this guide will be replaced with your username and profile icon. This is where you can access your profile settings or log out of your OpenETC site.
Key Terms:Dashboard and Site Title Button. Please take a moment to familiarize yourself with these terms and ensure you know where to find them within your site.
Click on your Site Title Button (labelled ‘edciteaching’ in this guide) to open your Dashboard.
Important: This is your site’s dashboard.
Click your Site Title Button again to return to your published site view—what visitors will see when they visit your blog (without the ability to see the menu bar).
Please Note: Your published site view may look different from the examples in this guide. That’s expected—it depends on the template you selected and how you’ve customized your site. There’s no need to worry—as long as you can navigate between your dashboard and published site, you’re on the right track!
If you hover over your Site Title Button, you’ll see an option to choose or change your theme.
Important: If you selected a course template, there’s no need to change your theme—though you still can if you’d like. However, if your site is currently using the default Twenty Twenty-Two theme (as shown in this guide), it’s strongly recommended that you switch to a more accessible and user-friendly template.
Tip: Be sure to hover your mouse over your Site Title Button—don’t click it—to reveal the full dropdown menu with the Themes option.
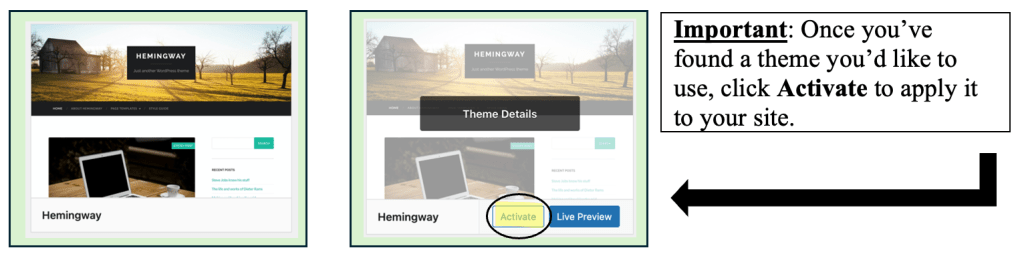
In the dropdown menu that appears when you hover over your Site Title Button, scroll down and click on Themes to view available site designs.
Task: If you did not select a course template when setting up your site, take this time to explore and choose a new theme for your blog. For consistency, the rest of these guides will use the Hemingway theme as a visual reference.
Once you activate your theme, you will see a confirmation message at the top of your screen indicating that the new theme is now active.
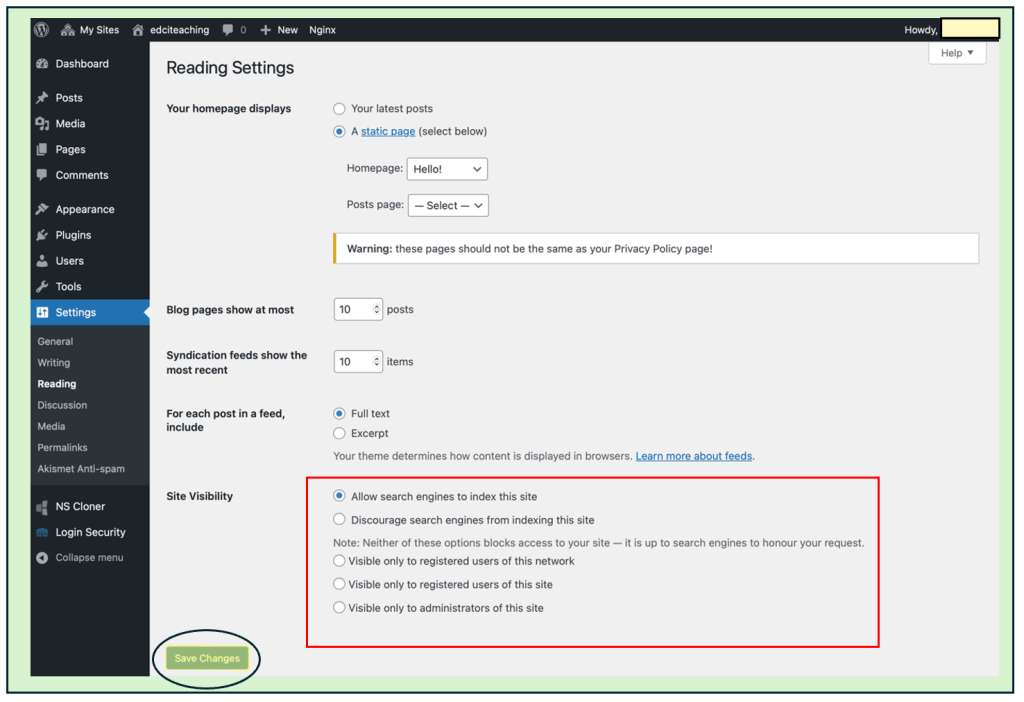
To review or change your privacy settings, go to your Dashboard, click on Settings, and then select Reading. From there, you can adjust who is able to view your site.
Please Note: The options at the bottom of the Reading settings page, under Site Visibility, allow you to choose your preferred privacy settings—just like you did when you first signed up for your site.
Important: The top two options (allow/discourage) are open on the web, but you can still protect your posts with a password. To share your thoughts and ideas openly with the class, you will need to choose either one of the ‘allow’ or ‘discourage’ options.
Visible to registered users of this network – Only students and educators in B.C. who are logged into any OpenETC site can view it (email instructor first before choosing this option).
Visible to registered users and administrators – Only people you give specific permission can view and/or edit your site (email instructor first before choosing this option).
Important: Always make sure to click Save Changes after updating any settings or templates. Your changes will not be applied unless this button is pressed.
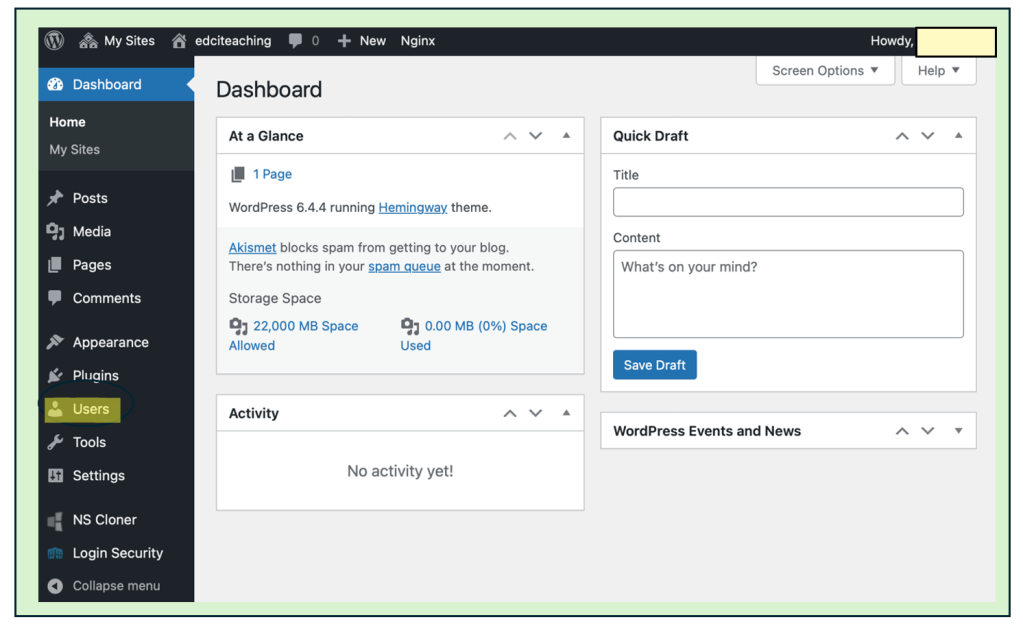
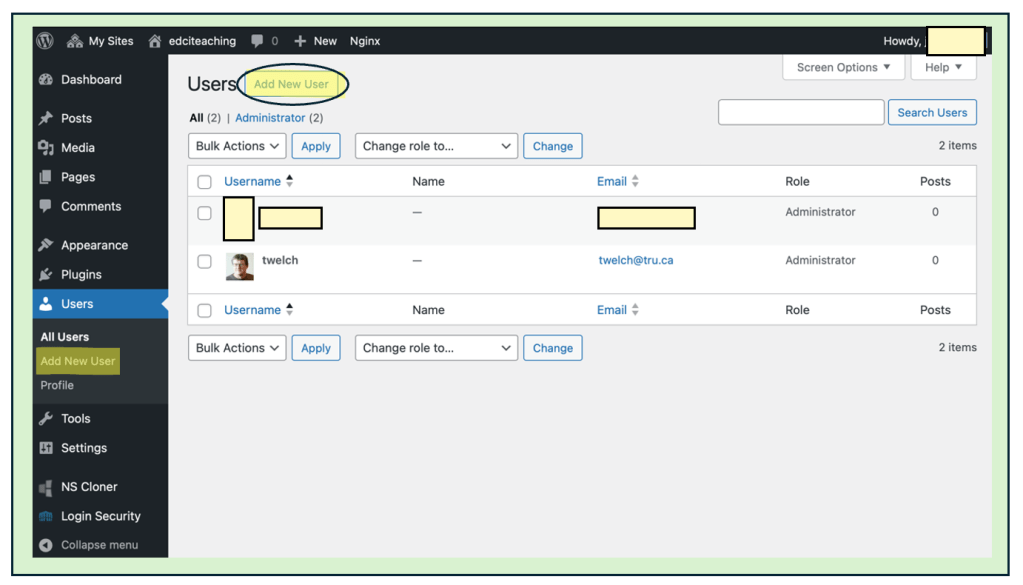
To add/remove another user to your site, click on the Users section in your dashboard.
Note: If you selected “Visible to Registered Users (or administrators) of this site” as your privacy setting, you’ll need to add your course instructor as a user to give them access to your site.
Task: If your website’s visibility is restricted (set to “Visible to Registered Users” or “Visible to Administrators”), you will need to ensure your instructor is added as a user so they can access your site.
If your site privacy is set to “Visible to Registered Users,” you will need to add your instructor as a user. Assign them the Subscriber role if they only need to view your site, or the Editor role if they will be leaving comments, providing feedback, or editing content.
If your site privacy is set to “Visible to Administrators,” you will need to add your instructor as an Administrator.
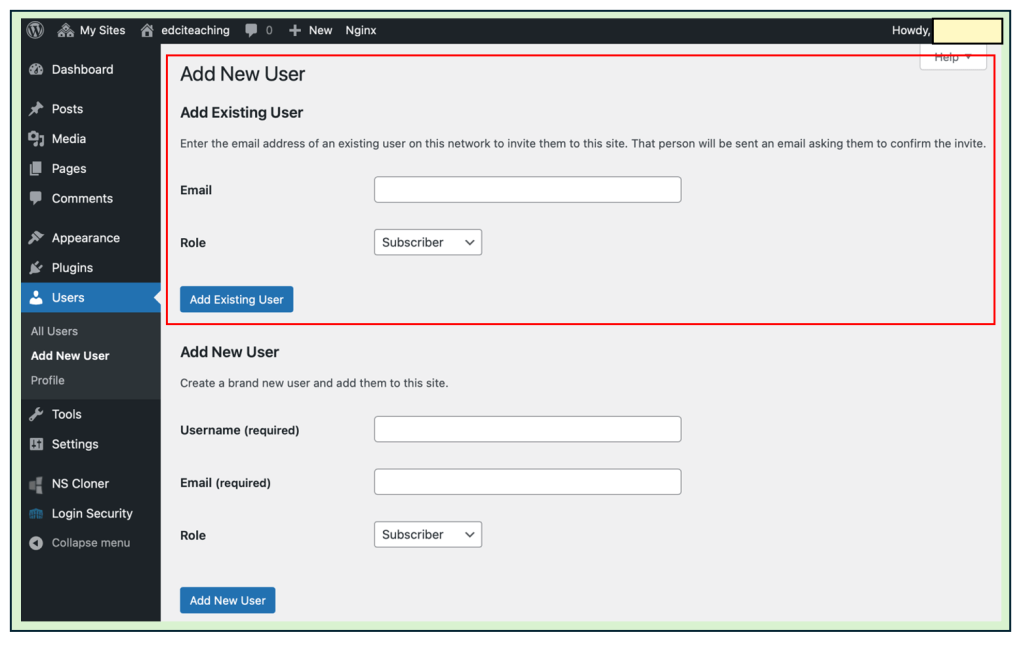
After clicking on either of the “Add New User” buttons, fill out the required information. Use the guidance in the Task box above to determine which role you should assign to your instructor.
Important: Since everyone in this course (including instructors) already have an OpenETC account, be sure to use the “Add Existing User” option and enter their UVic email address. This is the same email used when setting up OpenETC accounts, so it must be entered correctly to successfully add them.
If your site privacy is set to “Visible to Registered Users,” you will need to add your instructor as a user. Assign them the Subscriber role if they only need to view your site, or the Editor role if they will be leaving comments, providing feedback, or editing content. If your site privacy is set to “Visible to Administrators,” you will need to add your instructor as an Administrator.