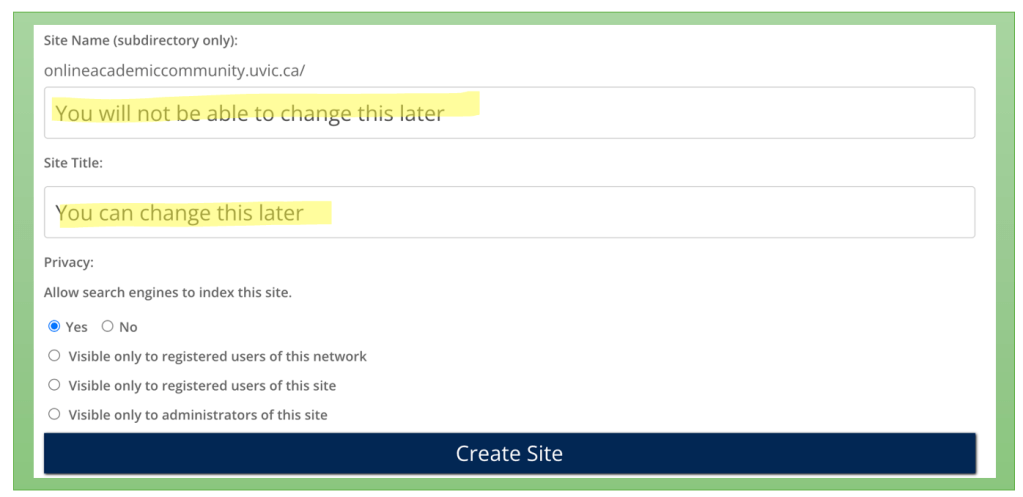
You will be redirected to a screen that will ask you to choose a site URL name, site title, and privacy preferences.
Tip – Consider choosing a site domain that is not directly connected to a specific course (i.e., edci136learning). This allows you to use your UVic site for a variety of purposes (personal, professional, academic, etc.)
Choose a ‘Site Name’ (You cannot change this later)
Important: This will become your site’s URL. If you choose (randysmith), your URL will be onlineacademiccommunity.uvic.ca/randysmith. You will need to remember this for later.
Choose certain ‘Privacy’ settings that match your comfort level regarding who can view your site.
The top two options (yes/no) are open on the web, but you can still protect your posts with a password. To share your thoughts and ideas openly with the class, you will need to choose either one of the ‘Yes’ or ‘No’ options.
Visible to registered users of this network – Only students and educators at UVic who are logged into their UVic OAC site can view it (email instructor first before choosing this option).
Visible to registered users and administrators – Only people you give specific permission can view and/or edit your site (email instructor first before choosing this option).
Important: You can make your site public, private, or visible only to logged-in users. You can always change this later in your settings.
Press ‘Create Site’
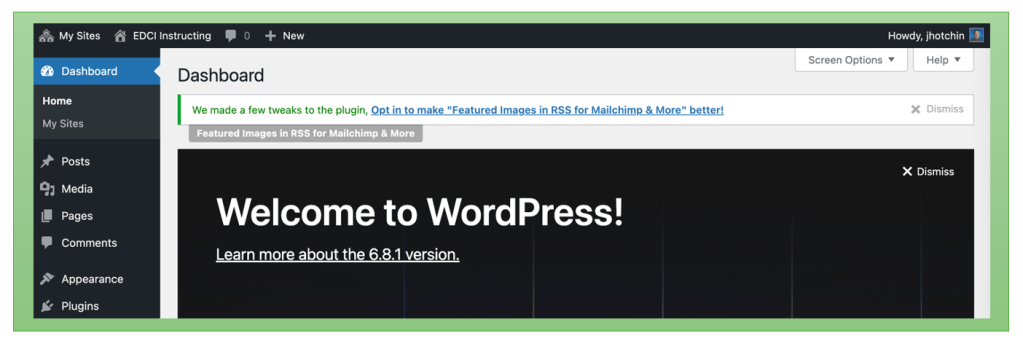
You will get a confirmation message that you have created your site. Press ‘Log In’ to navigate to your Dashboard.